Reticulation: There was a too rapid change in temperature during processing (e.g., the film was taken from a warm developer to a cold rinse).
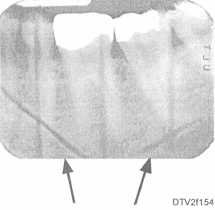
Crescent-shaped lines (fig. 1-54): The film packet was creased or bent.
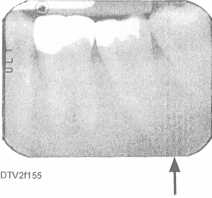
Herringbone image (fig. 1-55): The wrong side of the film, packet was facing the source of the X-ray beam during exposure causing the embossing pattern from the lead backing to appear on the film.

Figure 1-54. - Crescent-shaped lines on film.

Figure 1-55. - Herringbone image.
Black areas: The film was pulled too rapidly from its black paper wrapping, causing a discharge of static electricity.
White spots: The developer failed to work on these areas because of dirt or air bubbles.
Foreign object image (fig. 1-56): Dentures or other objects were in the patient’s mouth during the exposure.
FILM VIEWERS
The film viewer consists of a metal case with a back-lighted screen. The viewer is used to mount and examine radiographs. Figure 1-57 shows a typical desk mount film viewer. Never light the film viewer in the darkroom when you are working with unwrapped, unprocessed film. Keep the viewer screen clean at all times.
MOUNTING RADIOGRAPHS
After processing the X-ray film, you will mount the finished radiographs in cardboard or plastic holders. Mounting makes the radiographs easy to view, keeps them in a chronological order, and protects them from damage. Mounted radiographs may be viewed from either the front or back of the mount. If viewed from the front, the teeth appear on the film as if you were looking directly into the patient's mouth. If viewed from the back, the teeth appear on the film as if you were sitting on the patient's tongue looking out. Always mount X-rays in anatomical order. After you mount the radiographs, file the mount in the patient's Dental Record. There will be times when the dental officer will want to retain the radiographs for diagnostic purposes (e.g., endodontics). These are normally placed in a drug envelope, labeled and dated, and placed in the dental record.

Figure 1-56. - Foreign object image.
Continue Reading