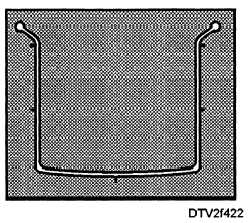
Figure 4-22. - Adult rubber dam frame.
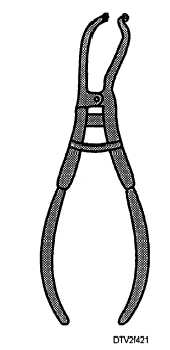
Figure 4-21. - Rubber dam clamp forceps.
working ends have small projections that fit into two corresponding holes on the rubber dam clamps. The area between the working end and the handle has a sliding lock device. This sliding lock device locks the handles in positions while the provider moves the rubber dam clamp around the tooth.
Rubber Dam Frame
To place and clamp a rubber dam around the tooth is not enough. The dentist still needs something to hold the loose outer edges of the rubber dam sheet so that the area is visible, and provides access to the tooth being treated. The need is met with an instrument called the rubber dam frame. Most of the rubber dam frames used today are U-shaped. One of the most popular is the Young frame, which is available in adult (fig. 4-22) and pediatric sizes. When the edges of the rubber dam are connected to the small, sharp projections on this U-frame, there is adequate access to, and visibility of the area of treatment.
RUBBER DAM APPLICATION
The use of the rubber dam is an important part of quality dental treatment and infection control. To save valuable chairside time, place the rubber dam following the administration of local anesthetic (as directed by the dentist). To place the rubber dam, you will need the rubber dam material, frame, punch, clamps, and clamp forceps.
Preparation
The first step in applying the rubber dam is to check the contact areas of the teeth to be isolated. Use a piece of dental floss to do this. The next step is to determine which tooth the rubber dam clamp will be placed upon. Once this is determined, select a rubber dam clamp for a trial placement.
CAUTION
To prevent the patient from aspirating or swallowing the rubber dam clamp, always tie dental floss (ligature) on the bow of the clamp before placing it in the patient's mouth.
A simple and secure method is put both ends of a piece of floss together and place them on a flat surface. This forms a looped end where the floss is folded in half. Place the clamp over the floss with the bow of the clamp facing up. Now, place the two loose ends through the looped end and carefully pull the loose ends through the loop until the floss is secured tightly over the bow of the clamp (fig. 4-23). You should now
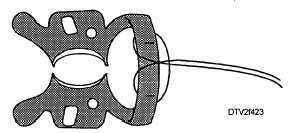
Figure 4-23. - Ligature on rubber dam clamp.
Continue Reading